Apologies for having to miss the new year's first DB challenge. I've been on overdrive at work because I'm going to be taking 2 weeks off to go home to Indonesia and Singapore for Chinese New Year. Needless to say, I've had no life whatsoever the past month because my lab's also trying to submit an abstract for a scientific meeting in June. And if this isn't enough, I'm thinking of joining a business plan competition centered around a food-related idea that will be web-based. Phew!
At the same time, I'm sad that I have to sit out on this DB challenge because I've never made lemon meringue pie before and I actually have some funky ideas on how to make the recipe mine, so to speak. I will definitely try this out in the near future, so keep a look out for it here. Meanwhile, please enjoy the other talented DBers' creations here!
Monday, January 28, 2008
It's just not meant to be... Argh!
Rants of
marias23
at
12:24 PM
4
comments
![]()
Labels: Daring Bakers
Friday, January 18, 2008
Gawd, I'm so Asian!
It's been a rough week. Not only has my experiments tanked (as usual), it is frigid here in Chicago. I walked home from the lab earlier this evening and by the time I got home, my cheeks and thighs were frozen solid! But there's nothing a bowl of homemade soup can't warm up immediately, so I made miso soup.
Miso soup equates comfort to me. I grew up eating Japanese food pretty regularly because my parents love Japanese food. So, what is miso anyway? Miso is basically fermented soy bean paste. There are a few types of miso; namely, white, red and black miso. Miso soup is a Japanese culinary staple but miso itself is increasingly used in many other contexts, such as glaze on fish and in sauces. A few factors that determine the flavor of miso include the length of fermentation and the other raw materials added to it. Other grains that have been used include barley, quinoa and adzuki. Unfortunately, the miso I happen to have in my possesion isn't that exciting. It's just plain reduced sodium misoshiru, but it'll have to do! Don't you just love that the Japanese always uses cute cartoon characters on everything? Even miso! :)
I started off by boiling a quart of water in a saucepan before putting a dashi bag in the boiling water for 5 minutes. Dashi is another uniquely Japanese ingredient that is analogous to bouillon but is flavored with kombu (edible kelp). The dashi bags I have happen to also have bonito flavor. The term "bonito" refers to a species of predatory fish that belongs in the mackerel family. Again, it gives dishes a distinctly Japanese flavor.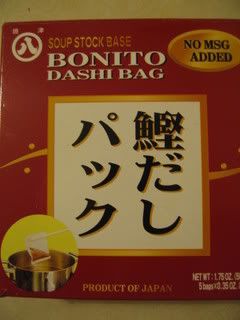
While boiling the dashi bag, I diced some tofu and some green onion. Miso is an incredibly versatile ingredient. Besides tofu and seaweed, which are the most popular "fillings" of miso soup, you can many other things such as shellfish, mushrooms and noodles. I love love love tofu so I added a whole block of tofu to my soup. I'm so Asian sometimes, haha!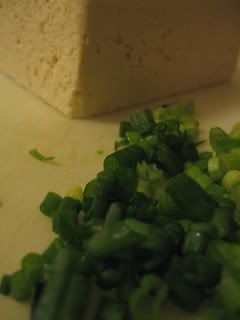
After boiling the tofu for about another 5 minutes, I turned off the heat and removed the pan from the stove. After letting it cool for a few minutes, I stirred in two tablespoons of the delicious miso. It can take a few minutes for the miso to dissolve, especially if it is cold. It's crucial to never EVER boil miso and to add the miso paste only after you removed the soup from the heat. Boiling miso will create a bitter flavor and destroy the beneficial cultures. 
I topped my miso soup with sliced green onions and I had to have two whole servings! Other toppings include fried scallions (which is such an Indonesian thing to do) and seaweed. Homemade miso soup is the perfect remedy to a frigid Chicago winter day.
Recipe for Miso Soup
Ingredients:
1 quart water
1 dashi stock bag
1/2 of a 16-oz block of your favorite tofu (you can use the whole block if you love tofu, like me), diced
2 Tbsp. miso paste
Sliced green onion
Bring the water to a roiling boil in a saucepan. Put the dashi bag in the boiling water and let it continue to boil for 5 minutes.
Take the dashi bag out and add the diced tofu. Boil another 5 minutes.
Remove from heat. Add dashi and stir until it dissolves.
Ladle into bowl, top with sliced green onions and itadakimasu!
Rants of
marias23
at
8:42 PM
1 comments
![]()
Labels: Asian, japanese, recipe, tofu, vegetarian
Wednesday, January 2, 2008
Happy New Year to one and all!
The holiday season is almost over and I must say that I'm actually relieved. As you may know already, I was stuck in Chicago for the holiday season and ended up going in to work every day the whole month (and counting). It is days like these that makes me rethink the wisdom of my career choice. But anyhoo, the holiday season has been rather toxic nutritionally for me, what with sugary, chocolatey goodness tempting me from every single corner. I must say that I wasn't so effective at combating these tasty temptations and I've decided that I need to detox for the New Year, which brings me to my New Year resolutions.
Of course, there's the requisite resolution of losing weight and leading a more healthy lifestyle, but the one resolution that I think will be more manageable and achievable is to try something new culinarily at least every other week. This includes eating or making a new food I've never eaten or made before. I must say that I've made pretty good progress on this one resolution because I have tried one thing that I've never had before today: caviar. I've heard many rave about this luxurious, exquisite food and I've always been curious about it.
Considered a luxurious food item, real caviar is the processed, salted roe of the sturgeon. The most expensive are from the Beluga, Ossetra and Sevruga varieties. It is often used as garnish or served as an hors d'euvres with creme fraiche on a cracker or mini pancake. A friend of mine was nice enough to buy me a 2-ounce container of paddlefish caviar to further this project of mine. Sure, it may not be "real" caviar, but hey, grad students can't be choosers :)
I figured that since I was going to pursue such a luxury, I had to do it right. Upon more research, classically, caviar is served with a touch of creme fraiche on blini, which is a yeast-raised buckwheat pancake. I found this recipe on Epicurious and substituted some ingredients with whatever I had in my pantry. We started by mixing the yeast with warm water and sugar before letting it stand for 5 minutes until foamy, just to ensure that this dear eukaryotic microorganisms are still alive and well.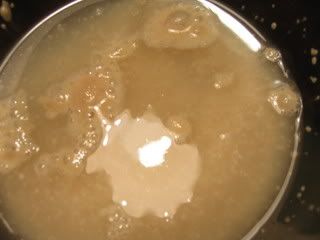
Then, the flours, salt, milk, eggs and butter were added to yield a thin batter that looks like this.
The batter was covered with plastic wrap and left to raise for about 2 hours, after which it looked a lot livelier and doughier, which was pretty darn cool! I've never made yeast-raised pancakes before and at this point, I wasn't really sure whether this was what it was supposed to look like, but I went ahead with it anyway.
For this purpose, I heated my nonstick skillet and sprayed it with some canola oil before spooning one tablespoon of the batter onto the skillet for each pancake or blin.
Like making normal pancakes, we wait until the bubbles have populated the surface before turning it and continue to cook until the blinis are browned on both sides. I found that about 1-2 minutes on each side sufficed.
The blinis turned out beautifully fluffy and light. The buckwheat flour, I think, adds a faint nutty flavor to it, which I liked. It was pretty darn good by itself, though a tad bland. It is so fluffy that I think I'm a buckwheat flour convert when it comes to pancakes. I might just start making yeast-raised pancakes too!
So, back to the highlight of this project, the caviar. Due to the unavailability of creme fraiche at my neighbourhood grocery store, I resorted to fat-free sour cream (my generous friend has a health condition that almost bans fat in his diet). Topped with a teaspoonful of sour cream, the blinis are ready for the star of the show. We then spooned a bit of the caviar onto each blini. Doesn't it look beautiful?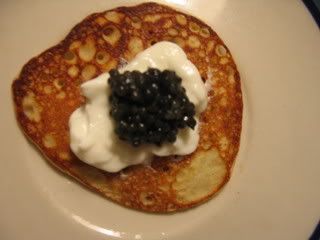
I must say that even though I've never had caviar before, the taste is very familiar. It's not terribly fishy, as I expected it to be, but it quite salty, which was definitely brought out by the (relative) blandness of sour cream and blinis. Many told me that superior caviars are in fact, not very salty. Good caviars contain less than 4% salt. It has a yummy crunchiness and I like that the flavor just invades the whole mouth once I bit into these dark, luxurious orbs.
At the end of the day, it was rather interesting. I wouldn't mind trying out the better sturgeon caviars that aren't as salty, but I'm not going to go out of my way to seek out the best caviar. After all, it isn't really within my humble budget. However, I loved loved loved the blinis. Those yeast-raised buckwheat pancakes were so good, even with my minot ingredient adjustments. I will definitely make the blinis again. The recipe's below and any ideas what would make a nice topping for this nutty, fluffy pancake?
Recipe for yeast-raised buckwheat pancakes (Blinis)
Ingredients:
1/4 cup warm water
1 1/4 teasp. instant yeast
1 1/2 Tbsp. sugar
1/2 cup sifted AP flour
1/2 cup sifted buckwheat flour
1/4 teasp. salt
1 cup warm skim milk
3 Tbsp. butter, melted and cooled
2 large eggs, lightly beaten
Stir together warm water and sugar with yeast. Let stand 5 minutes until foamy. If it doesn't foam, start with new yeast.
Add the flours, salt, milk, butter and eggs.
Cover bowl with plastic wrap and place in a roasting pan filled with about an inch of warm water.
Let rise for 1 1/2 to 2 hours until the batter has expanded in volume and has bubbles on the surface.
Heat nonstick skillet and spray on it some canola oil (or you can use melted butter if you want). Spoon one tablespoon batter for each pancake. Depending on the size of the skillet, you can probably work in batches of 3 each time.
Turn pancakes once bubbles surface and let cook for another minute or two.
These are perfect with creme fraiche and caviar, or simply with some berry jam and cream. Enjoy!
Rants of
marias23
at
9:23 AM
4
comments
![]()
Labels: 2008 resolution, brunch, recipe

